How to create a hand-drawn painted looking artwork
7. Now duplicate your layer below that one and move it on top. Sharpen the pic by using the filter for Sharpening it slightly. Then apply
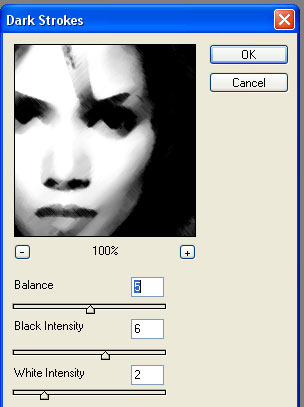
the Dark Strokes filter on that layer with settings Balance: 5 Black Intensity: 6 White Intensity: 2 (again standard settings that
appeared when opening the filter), see screenshot
The blending mode of that layer should be still on overlay, I've set the opacity to 77% but that depends on just how dark your picture
already is (you can also change those settings later once finished to see how to get the best type of drawing style for your used picture).
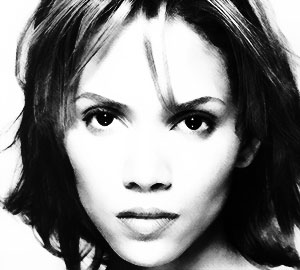
If you've followed my settings your picture should look something like this.
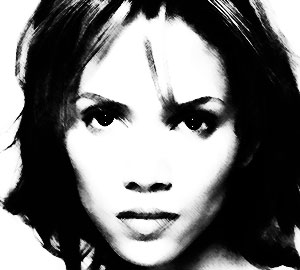
8. Now duplicate that layer and play around with the opacity for adjusting the darkness and contrast of the picture (it works best between
60 and 80%, depending on your picture and preferences). In case it wasn't enough, you can duplicate the picture again. I've duplicated the
layer twice for this tutorial, the first duplicated layer with an opacity of 60%, the other one with an opacity of 78%. The picture is
finished so far with this.
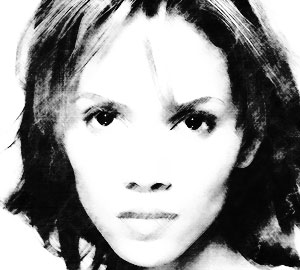
9. To get some more effects for this picture and make it look more realistic, you can add some brushworks to it, giving the picture some
texture. To get the best results in texture put the brush layers just below the top layer of the Halle picture (the top layer or the two
top layer, depending on how many you've needed for step 8), that way you'll have the darkness of the black parts for contrast and can still
see the texture. What also gets great results is putting a stockpic of a paper just on top of the bottom original layer, depending on the
color of that stockpic you get some nice coloring effects for your artwork as well. My finished result looks like this.
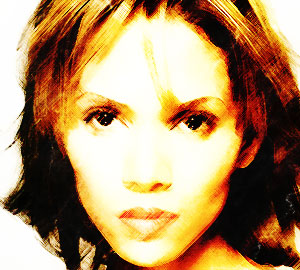
I've also done this tutorial with the colored picture of Halle so the effect works as well with colored pictures, giving them a slightly
different drawn look as you can see here (the settings remained the same as for the tutorial).My personal opinion however is that this
effect looks much better with a b/w piece.
Good luck with trying it out.
back
back to the tutorials